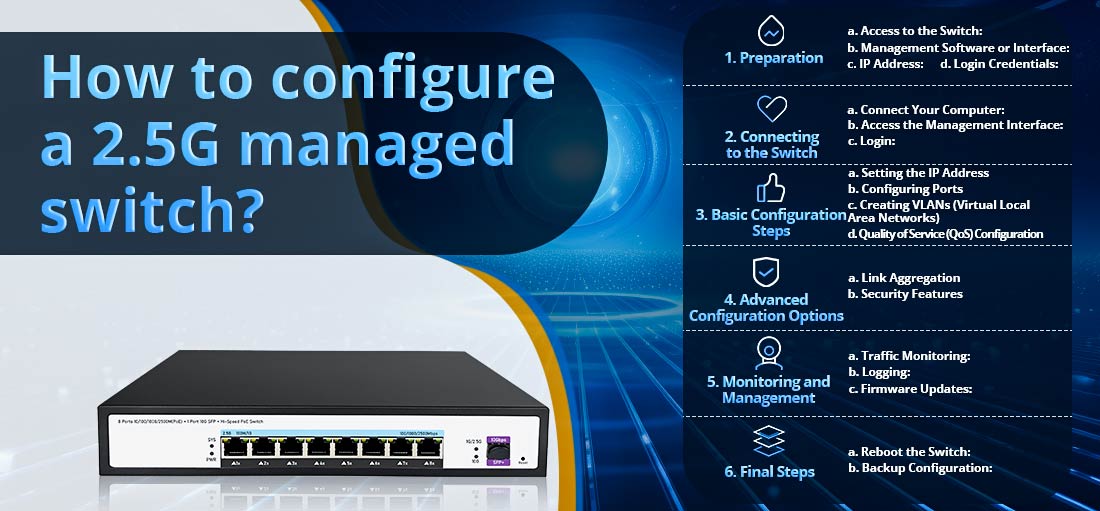
يتضمن تكوين محول 2.5G المُدار عدة خطوات، بما في ذلك الوصول إلى واجهة إدارة المحول، وإعداد معلمات الشبكة، وتكوين المنافذ، وتنفيذ ميزات مثل شبكات VLAN وجودة الخدمة (جودة الخدمة). فيما يلي دليل تفصيلي حول كيفية تكوين محول مُدار:
1. التحضير
قبل البدء في التكوين، تأكد من أن لديك ما يلي:
الوصول إلى التبديل: تعرف على كيفية الاتصال بالمحول — عادةً عبر كابل Ethernet.
برامج الإدارة أو الواجهة: يمكن أن تكون هذه واجهة ويب، أو واجهة سطر أوامر (CLI)، أو برنامج إدارة مخصص توفره الشركة المصنعة.
عنوان IP: حدد عنوان IP الافتراضي للمحول (الموجود عادة في الدليل) أو قم بتعيين عنوان IP ثابت على جهاز الكمبيوتر الخاص بك داخل نفس الشبكة الفرعية.
بيانات اعتماد تسجيل الدخول: اسم المستخدم وكلمة المرور الافتراضية للوصول إلى واجهة الإدارة (يجب أن تكون موجودة أيضًا في الدليل).
2. الاتصال بالمفتاح
1.قم بتوصيل جهاز الكمبيوتر الخاص بك:
--- قم بتوصيل أحد طرفي كابل Ethernet بالكمبيوتر الخاص بك والطرف الآخر بأحد منافذ المحول.
2.الوصول إلى واجهة الإدارة:
--- افتح متصفح الويب (لواجهات الويب) أو برنامجًا طرفيًا (للوصول إلى واجهة سطر الأوامر).
--- أدخل عنوان IP الافتراضي للمحول في المتصفح أو استخدم SSH/Telnet للوصول إلى واجهة سطر الأوامر (CLI).
3.تسجيل الدخول:
--- أدخل اسم المستخدم وكلمة المرور الافتراضية. يُنصح بتغيير بيانات الاعتماد هذه فورًا بعد تسجيل الدخول لأغراض أمنية.
3. خطوات التكوين الأساسية
أ. ضبط عنوان IP
1.انتقل إلى إعدادات الشبكة:
--- حدد موقع قسم "الشبكة" أو "تكوين IP" في واجهة الإدارة.
2.تعيين عنوان IP:
--- قم بتعيين عنوان IP ثابت للمحول الذي يقع ضمن نطاق شبكتك. تأكد من أنه لا يتعارض مع الأجهزة الأخرى.
--- قم بتكوين قناع الشبكة الفرعية والبوابة الافتراضية، مع التأكد من توافقهما مع إعدادات شبكتك.
3.حفظ الإعدادات:
--- تطبيق وحفظ التكوين. قد يتطلب هذا إعادة تشغيل المفتاح.
ب. تكوين المنافذ
1.الوصول إلى قسم تكوين المنفذ:
--- ابحث عن قسم "إدارة المنافذ" أو "الواجهة".
2.ضبط سرعة المنفذ:
--- تأكد من ضبط سرعة المنفذ على 2.5 جيجابت في الثانية. قد تكتشف بعض المفاتيح السرعة تلقائيًا، ولكن يمكنك ضبطها يدويًا إذا لزم الأمر.
3.تمكين/تعطيل المنافذ:
--- قم بتنشيط أو إلغاء تنشيط منافذ معينة بناءً على متطلباتك. تأكد من تمكين المنافذ المتصلة بالأجهزة.
4.أوصاف المنفذ:
--- اختياريًا، أضف أوصافًا للمنافذ لتسهيل التعرف عليها لاحقًا (على سبيل المثال، "كمبيوتر مكتبي"، "الخادم"، وما إلى ذلك).
5.حفظ التغييرات:
--- قم بتطبيق أي تغييرات تم إجراؤها على إعدادات المنفذ.
ج. إنشاء شبكات VLAN (شبكات محلية افتراضية)
1.انتقل إلى قسم تكوين VLAN:
--- ابحث عن "VLAN" أو "إدارة VLAN".
2.إنشاء شبكة محلية ظاهرية (VLAN) جديدة:
--- حدد معرف VLAN (على سبيل المثال، 10) واسمًا (على سبيل المثال، "شبكة الضيف").
3.تعيين منافذ لشبكات VLAN:
--- قم بتعيين منافذ تبديل محددة لشبكة VLAN المنشأة حديثًا. يؤدي هذا إلى عزل حركة المرور وتحسين أمان الشبكة.
4.تكوين إعدادات VLAN:
--- قم بتعيين نوع VLAN (على سبيل المثال، الوصول أو قناة الاتصال) وفقًا لإعداد الشبكة لديك. تقوم منافذ الوصول بتوصيل الأجهزة الطرفية، بينما تحمل منافذ قناة الاتصال شبكات VLAN متعددة.
5.حفظ التكوين:
--- قم بتطبيق وحفظ إعدادات VLAN.
د. تكوين جودة الخدمة (QoS).
1.الوصول إلى إعدادات جودة الخدمة:
--- ابحث عن قسم "جودة الخدمة" أو "إدارة حركة المرور".
2.تمكين جودة الخدمة:
--- قم بتنشيط إعدادات جودة الخدمة لتحديد أولويات حركة المرور الهامة (على سبيل المثال، VoIP، وتدفق الفيديو).
3.ضبط قواعد الأولوية:
--- حدد القواعد بناءً على عناوين MAC أو عناوين IP أو أرقام المنافذ لتحديد أنواع حركة المرور التي يجب أن تحظى بأولوية أعلى.
4.حفظ تكوين جودة الخدمة:
--- تأكد من حفظ أي تغييرات.
4. خيارات التكوين المتقدمة
أ. تجميع الارتباط
1.إعدادات تجميع ارتباط الوصول:
--- ابحث عن قسم "تجميع الارتباطات".
2.حدد منافذ للتجميع:
--- اختر المنافذ التي تريد تجميعها لزيادة عرض النطاق الترددي بين المحول والأجهزة المتصلة.
3.تكوين LACP (بروتوكول التحكم في تجميع الارتباط):
--- قم بتمكين LACP إذا كان مدعومًا، مما يسمح بتجميع الارتباط الديناميكي.
4.حفظ التكوين:
--- تطبيق وحفظ إعدادات تجميع الارتباط.
ب. ميزات الأمان
1.ضبط أمان المنفذ:
--- انتقل إلى إعدادات أمان المنفذ لتقييد الوصول إلى عناوين MAC محددة.
2.تكوين قوائم التحكم في الوصول (ACLs):
--- حدد القواعد للتحكم في الأجهزة أو أنواع حركة المرور التي يمكنها الوصول إلى شبكات VLAN أو منافذ محددة.
3.تمكين التحكم في العاصفة:
--- منع عواصف البث أو البث المتعدد أو البث الأحادي من خلال تحديد حدود لأنواع حركة المرور.
5. المراقبة والإدارة
مراقبة حركة المرور: قم بالوصول إلى قسم المراقبة لعرض إحصائيات حركة المرور في الوقت الفعلي واستخدام المنفذ ومعدلات الخطأ.
التسجيل: تمكين ميزات التسجيل لتتبع أحداث الشبكة والمشكلات المحتملة.
تحديثات البرامج الثابتة: تحقق من تحديثات البرامج الثابتة بانتظام لتحسين الأداء والأمان.
6. الخطوات النهائية
إعادة تشغيل التبديل: بعد إجراء تغييرات كبيرة، قد يكون من الضروري إعادة التشغيل لتطبيق كافة الإعدادات بشكل صحيح.
تكوين النسخ الاحتياطي: بمجرد تكوينه، قم بحفظ نسخة احتياطية من الإعدادات الحالية. ويضمن هذا إمكانية استعادة التكوينات بسرعة إذا لزم الأمر.
خاتمة
يتيح تكوين محول مُدار 2.5 جيجا إدارة مخصصة للشبكة، وتحسين الأداء، وميزات الأمان الضرورية لاحتياجات الشبكات الحديثة. باتباع هذه الخطوات، يمكنك إعداد المحول الخاص بك لتلبية متطلباتك المحددة، مما يضمن بيئة شبكة قوية وفعالة. تذكر توثيق إعدادات التكوين الخاصة بك ومراقبة الشبكة بانتظام للحصول على الأداء الأمثل والأمان.